 |
TI-99/4A Console Disassembly
|
This project shows how to disassemble the console just "for the fun of it" or for other
modifications. The only tools you really need is a phillips screwdriver and some heat sink compound.
|

|
|
Please make sure that all wiring and soldering is double checked before re-applying power. Though computer components are pretty hardy some do not take to being
wired up backwords or incorrectly. I have done my best to make sure that all diagrams
and instructions given here are correct, but I can not be responsible for any damage
an incorrect upgrade might cause. Also keep in mind that this will probably void any warranty :>).
|
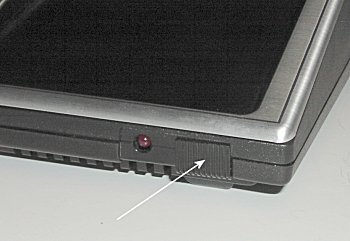
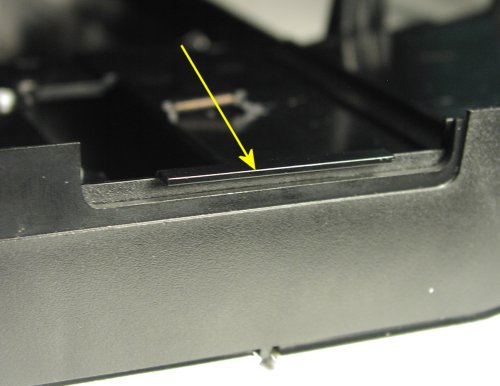
To get started disassembling the console you will need to remove the switch extension.
|

Just pull the switch extension straight out as shown by the arrow in the above picture. It simply
snaps in and out.
|
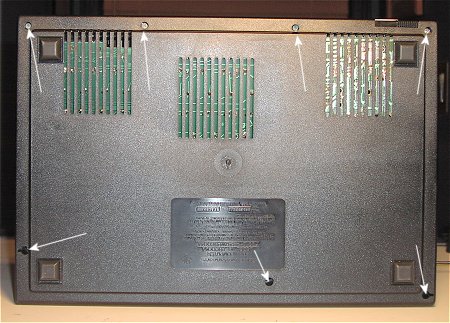
The next step is to remove the 7 screws which holds the consoles two halves together. The best
practice is to lay the console on a towel so you do not scratch or dent the soft aluminum covers, or
scratch the plastic on the newer beige models.
|
You are now ready to remove the bottom of the console. All the internal parts are fastened to the top
of the console. Next remove the power supply. It is fastened by 2 screws shown by the two arrows in the
above picture.
|
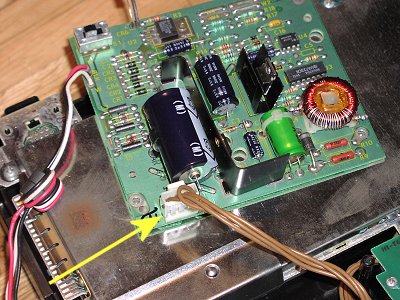
After the 2 screws are removed, pull out the power supply and turn it over. The arrow points at the
connector which connects the power supply to the motherboard. Some earlier models had the connector
halfway between the motherboard and power supply. Squeeze the clip and pull the connector
from the power supply. This connector can only go back on one way (unless you try really, really hard).
|
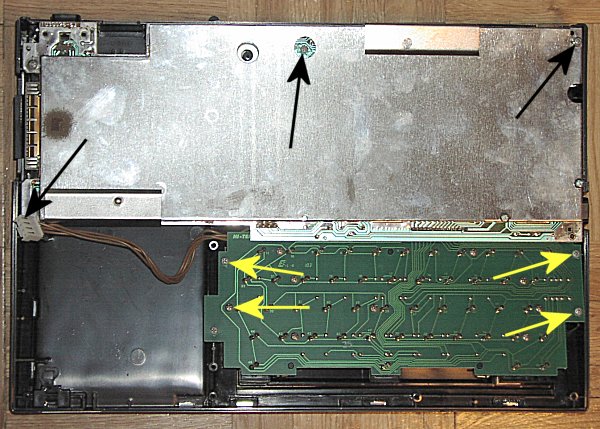
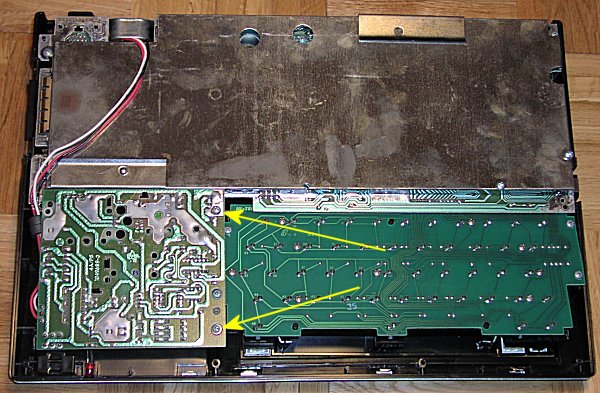
Now you are prepared to remove the motherboard and keyboard. The keyboard is held in by 4 screws
shown by the yellow arrows, and the motherboard is held in place by 3 screws shown by the black
arrows.
Now you are ready to remove both of these components. They should just pull right out of the case.
Be careful handling both pieces at this point as you don't want to break a wire on the keyboard
connector.
|
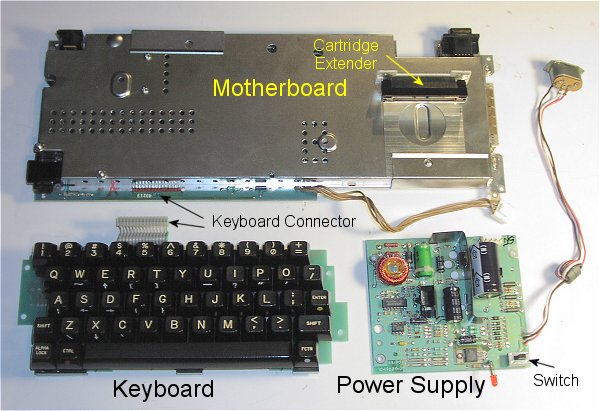
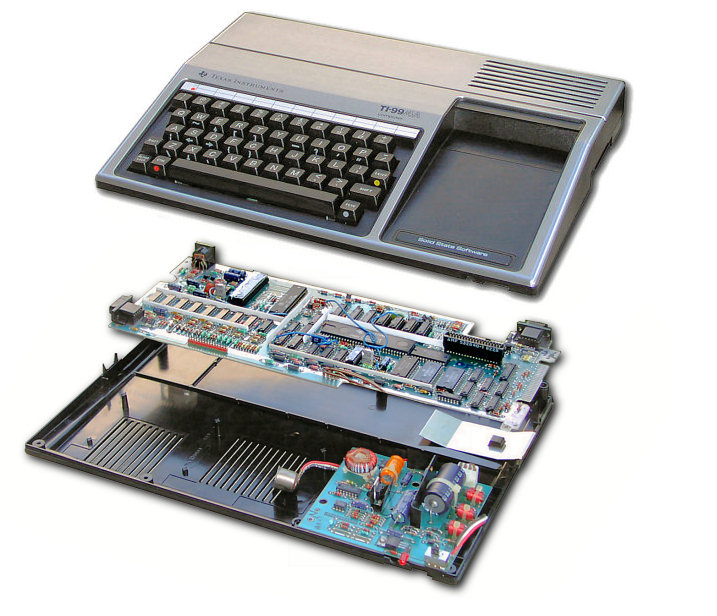
This pictures shows the 3 main components of the TI-99/4A. In this picture I have unplugged the keyboard
from the motherboard.
|
We are now ready to remove the shielding from the motherboard. The first step is to remove the
cartridge extender, it just pulls out. Next remove the two clips which also just pull out.
|
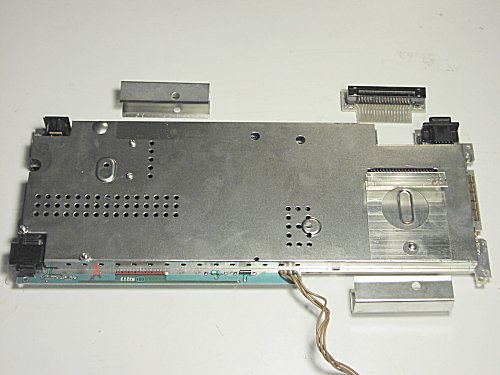
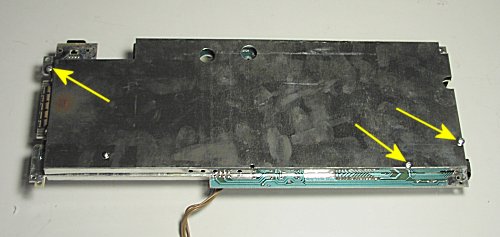
On the end of the motherboard you will notice a copper shield which fits around the expansion end of
the motherboard. Some motherboards use 4 screws while some only use 2. This one happens to use 2 screws.
Remove all the screws holding the shielding. Be careful with these screws, particulary when re-assembling
as you can easily strip them, and they are very small.
|
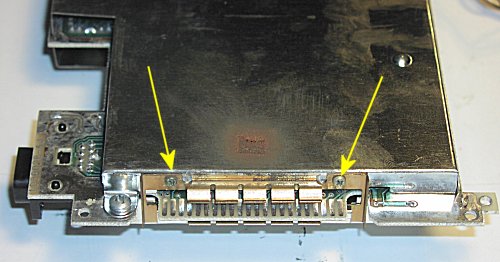
To finish the removal of the shielding you will need to remove 3 bolts. They are shown by the arrows
in the above picture. They do have small lockwashers, so be sure to keep an eye out for them when you
remove the nuts. BE SURE to notice the direction the bolts are inserted, as on some
motherboards if you put them in "upside down" the case will hit them, and not go all the way together.
|
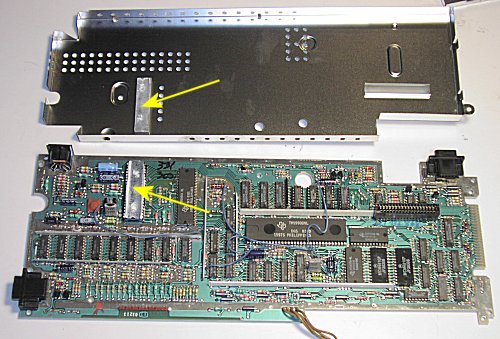
This picture shows the motherboard in all it's 16 bit glory! The arrows show the heat sink and video
chip. You will probably notice that the heat sink material has dried up. I suggest cleaning the old off
and applying new heat sink compound before re-installing the shielding.
|
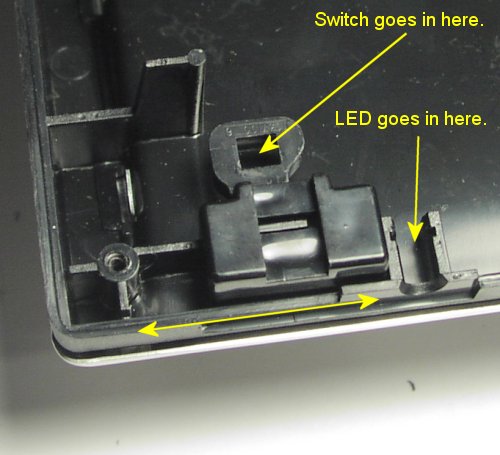
To re-assemble the console, you just need to reverse the steps above with a few things to keep in mind.
One, is to make sure the second part of the switch is in it's correct position. The above picture shows
this. This part needs to be in it's correct slot before re-installing the power supply. The switch
on the power supply must fit in the square on this piece. Also the LED fits into the slot shown by the
arrow above.
Another is to make sure that you have all the wires routed correctly. They pretty much will only go one way
but you don't want to pinch any of the wires. You can use the above pictures to see how they go.
|
Remember to put the cartridge extender back in, I have put several of the consoles back together
only to find this part sitting on the bench. Makes it tough to use any cartridges :>).
The last thing to do is to put the sliding cover back in on the expansion slot in the case. Though leaving this
out will not cause any issues, any good TI'r would be embarrassed not to have this installed. The picture
above shows this part. You can usually find this part laying on the floor somewhere.
|
