 |
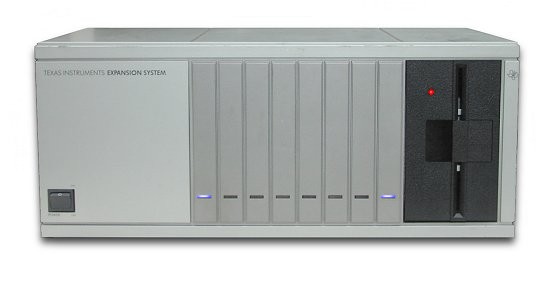
Blue LED's in PEB
|

This is a project that is just for fun. I have heard of using blue LED's before, but have
never thought it was worth the trouble. I thought I would go ahead and try it just to see
what it looks like. Wow! I can't believe how different it makes the PEB look. There is something
about that blue glow that gives it a very futuristic appearance.
If you wish to give it a try then the following instructions should be able to give
you a hand.
|

|
|
Please make sure that all wiring and soldering is double checked before re-applying power. Though computer components are pretty hardy some do not take to being
wired up backwords or incorrectly. I have done my best to make sure that all diagrams
and instructions given here are correct, but I can not be responsible for any damage
an incorrect upgrade might cause. Also keep in mind that this will probably void any warranty :>).
|
Actually there are no LED's in the PEB, they are included in the plug-in cards. Replacing the LED's
in the cards is simply a matter of removing the card, unsoldering the old LED, and soldering in the new
blue one.
I picked up my LED's at Radio Shack, but any electronic store should have them. They range in
price from $2 to $3. You should use one that is rated in the 5-6 volt range. The Radioshack number
I used was 276-311.
|

There is not much you need to know about LED's to complete this project other than they do have
a "polarity", that is you must know which way to put them in. Usually the worst thing that will happen
if you do put them in backwards is that they won't work.
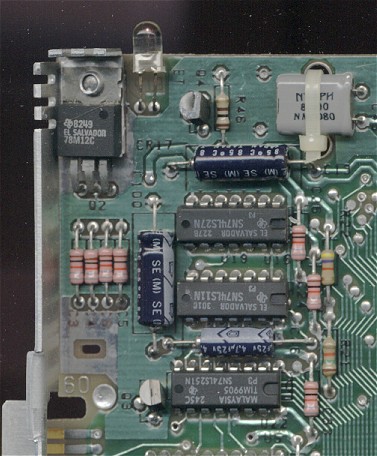
Sometimes they can be a bit tough to spot but LED's come with a flat spot next to one of the leads.
You don't need to worry whether this is the anode or cathode, you only need to make sure you solder it
in the same way the old one was. I have tried to show this in the picture above. Also try to keep them
organized as most LED's come with clear shells no matter what color they are, if you get them mixed up
the only way you will be able to tell them apart is to power them up.
I replaced the yellow LED's with blue ones in my peripheral interface expansion card, my RS232 card
and my disk controller card. To replace them you only need to remove the cards (make sure power to the PEB has been off
for at least 2 minutes), open them up, make note of where the flat spot is, unsolder the old one, and
solder in the new one. If you need a little help in removing the cards
click here.

The above picture shows a typical LED installed on an expansion card.
After installation, replace the cards, power up the PEB, and enjoy the new "Cool Blue"!!
|
|


