 |
TI Command Module
Console Port
Disassembly
Maintenance/Repair
|

|
|
Please make sure that all wiring and soldering is double checked before re-applying power. Though computer components are pretty hardy some do not take to being
wired up backwords or incorrectly. I have done my best to make sure that all diagrams
and instructions given here are correct, but I can not be responsible for any damage
an incorrect upgrade might cause. Also keep in mind that this will probably void any warranty :>).
|
Many module problems come from dirty contacts, either on the cartridge or the module connector on the console.
Dirty contacts can cause lockups, screen garbage and other annoying problems. Cleaning module contacts is a quick
and easy job. Cleaning the console module port does take a little more effort.

Part 1 Command Module Disassembly
|
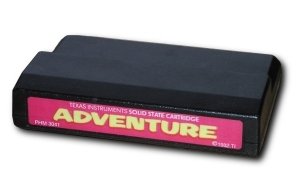
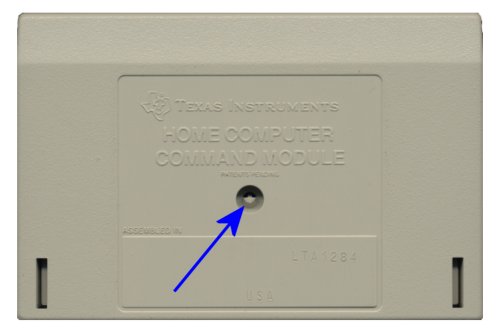
The above picture shows the contact end of the two most common types of command modules (cartridge). The top
cartridge is the type with a spring loaded door, while the bottom shows the cartridge which did not come with one.
|
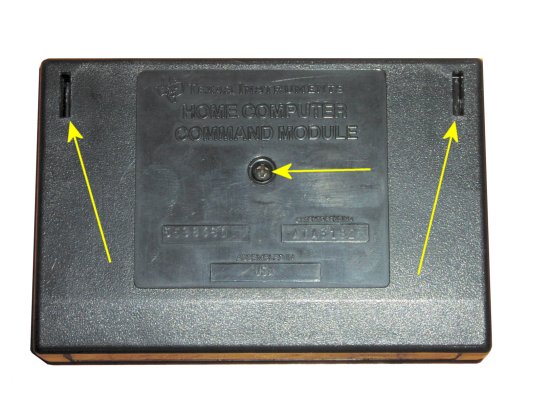
The first step to disassemble the cartridge will be to remove the screw (if yours does not have a screw see below).
It is shown by the yellow arrow in the picture above. Also shown by the other two arrows are the clips which also
hold the case together. More detail on the clips is shown below.
|
If your cartridge has a clip like shown in the above picture you will need to bend it back after you have the other
two clips loose. Don't worry if you break it off, the two remaining clips will easily hold the cartridge halves
together.
|
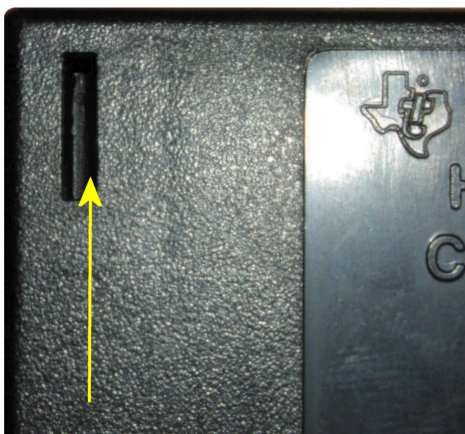
The above picture shows a close up of one of the two clips. Insert a small, straight screwdriver into the slot
where the yellow arrow points to. As shown above, you would need to push the clip to the left, while gently pulling
the case apart a little. Repeat for the other clip. Gently fold the case open being careful not to tear the label
on the end of the cartridge. You only need to open the case enough to remove the circuit board. Be careful here that
the spring for the cover does not fly out (if the paticular cartridge has one).
|
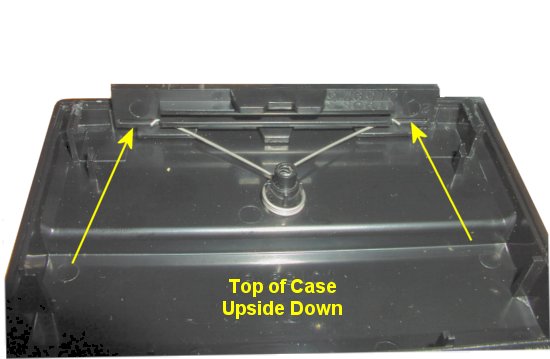
The above picture shows how the spring and door goes together. The yellow arrows are pointing at some small
groves that the spring fits into.
Just reverse the above steps to re-assemble the cartridge.
|
Part 2 Cleaning Modules Contacts
|

To clean the contacts I use contact cleaner which I picked up at Radio Shack. It does a very nice job of cleaning
the contacts, and it uses a semi-abrasive tip with cleaning fluid.
I have also in the past used an eraser on the
end of a pencil. If you do use an eraser be sure that you don't leave any traces of it behind.
If the contacts are very dirty or oily you may wish to use a thin rag dipped in a little tape
cleaning solution. Be sure to clean both sides of the contacts.
|
Part 3 Cleaning Console Port
|
The only way to really give the port connectors a good cleaning is to remove the port from the console. This might
seem like a lot of trouble but more than likely this should be the only cleaning it will need for a very long time.
For instructions on how to disassemble the console go
Here
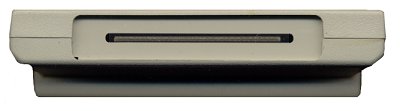
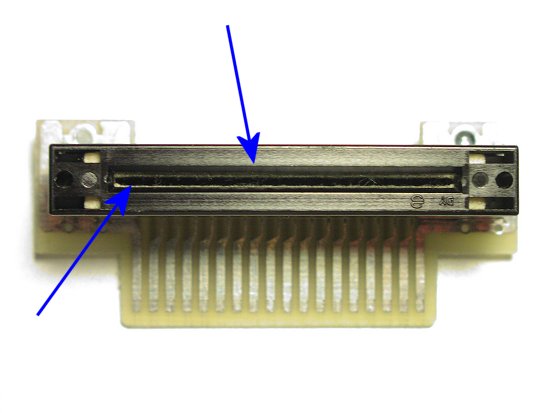
The above picture shows the cartridge port with the cartridge door open. You can't really tell from the picture
but this port is quite dirty.
|
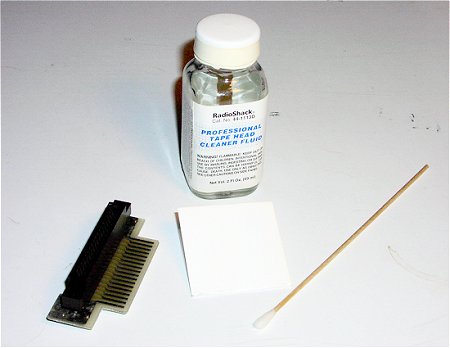
To clean the port I use Tape head cleaning solution. I also use a standard business card (cut slightly to fit into
the port), folded in half, and a q-tip to apply the tape head cleaning solution to the end of the business card.
|
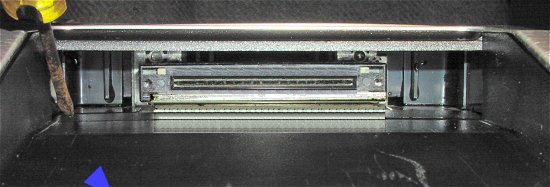
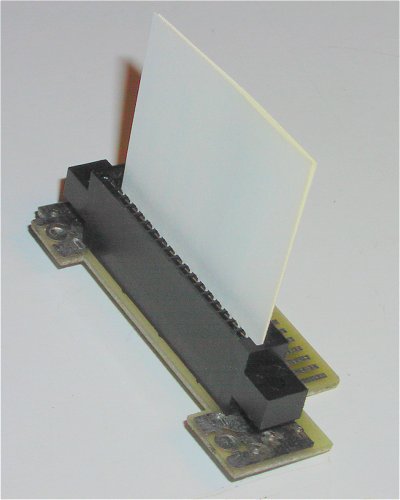
Remove the cartridge port from the motherboard by pulling it straight out. You do not need to remove the metal
shielding from the motherboard to do this.
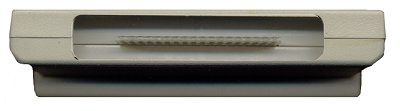
The above picture shows the port. The two arrows are pointing at the felt "cleaning strip" and the cover for it.
The idea behind the felt pad was to act as a cleaner for the cartridge contacts when you plugged in a cartridge.
Most suggest that this felt pad be removed as it does more harm than good. It just seems to collect more dirt
then it ever cleans off.
|
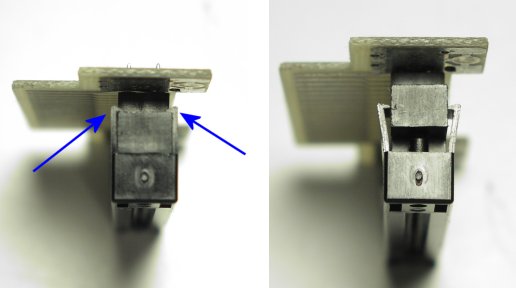
Removing the cover and felt pad is a simple process and the two pictures show how to do this.
|
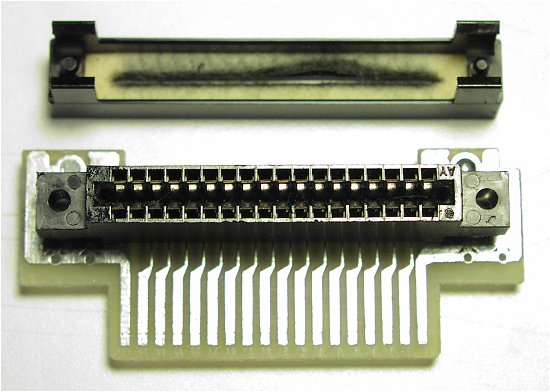
The picture above shows the cover and felt pad removed from the port connector. As you can see the felt pad has
seen better days. I will not be re-using the cover and felt pad, but just wanted to show what it might look like.
|
The next step is to clean the internal contacts on the port connector. I use a folded business card and apply
tape head cleaning fluid to the end which will be inserted into the port. Do this several times and then use a new
clean card and repeat the cleaning. Repeat this until the cards come out clean.
|
